DIY 110 film cartridges
I have a Pentax auto 110 camera, which uses the 110 film cartridge. It's not a very common film, but you can still get it from Lomography, which is the only company who makes 110 film. My photo supplies store sells some of Lomography's 110 film, but only 3 of them. One of them is a b+w film, and the other is a 200 speed film, which will not work well in the Pentax I have which only works with 100 and 400.
After searching on the internet I found out that people were using 16mm cine film or cutting bigger 35mm or 120 film to spool inside. So I found a 110 cartridge 3d print and printed it. I then designed a cutter to cut 35mm film into 16mm wide film. After sacrificing a couple rolls of film and a couple revisions I finally made a cutter that nicley cuts 35mm film.
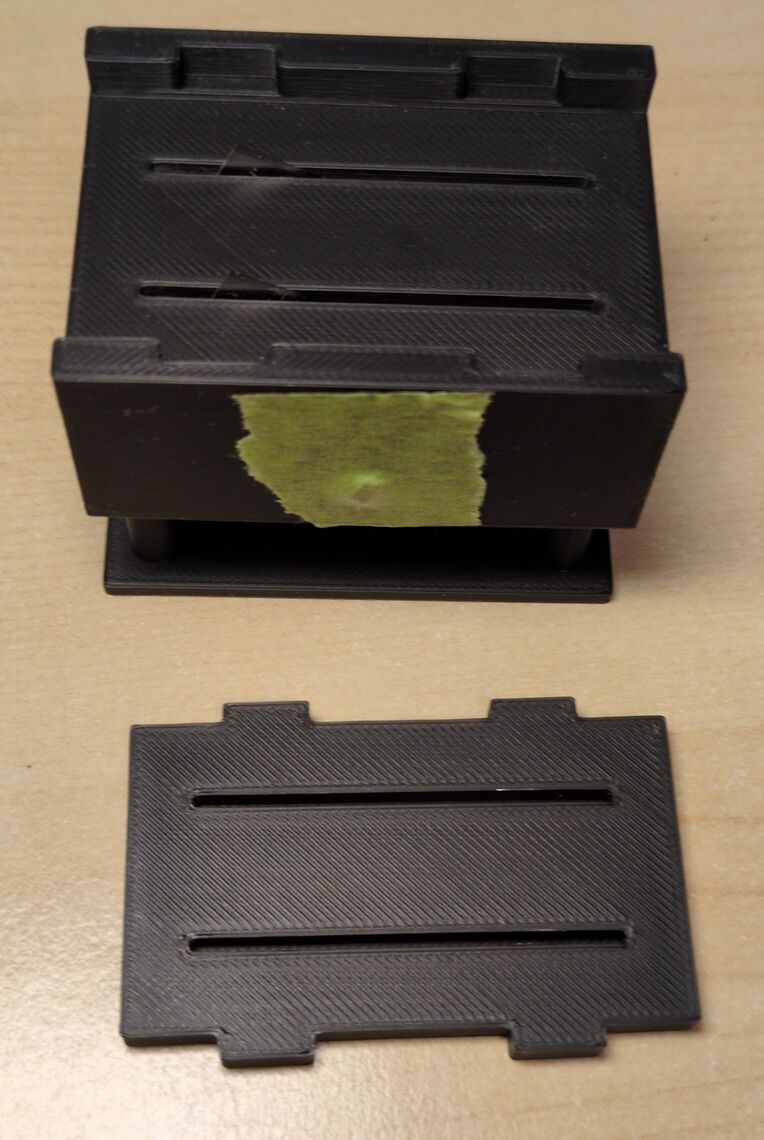
The 3d printed film slicer. It uses two standard single edge razor blades spaced 16mm apart to cut the film to the correct width. Below it is a cover for the cutter.

Two 3d printed 110 film cartridges without tops. The upper one is empty while the other one has a slightly smaller take up spool that is full of film. The top peice of the cartridge is laying upside down above all the cartridges.
In the dark room, I sliced the film, spooled it into my 3d printed cartridge and loaded it in my camera. I took it around the house and exposed some frames. After developing I found out the my respooling method worked pretty well. I then modified the cartridge so a full roll of 36 exposures would fit perfectly inside. I have not yet made any more 110 film cartridges, but will update this page and add more information like exposure count and compare prices.
I lightly modified the 35mm cutter into a 120 to 3x16mm cutter, but I'm still working out how to spool the films into the cartridge.
Files
Cartridge - printables.comModified take up spool
Spool
35mm cutter
back